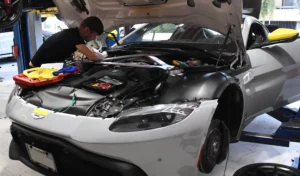
When a red 1971 Jaguar E-Type Series III V12 arrived at our Reseda workshop, the owner wanted more than a single repair. The goal was to bring this British icon back to a state where it could be driven, enjoyed and shown – mechanically sound under the bonnet, refreshed cosmetically, and refined inside. What followed was a multi-system project spanning the V12 engine, cooling, clutch hydraulics, brakes, suspension, steering rack, differential, fuel delivery, body paint, weatherstripping and interior audio.
Every phase of this project was documented with photos and video – from initial diagnosis through final verification. That documentation drives our process: we measure before we decide, we photograph before we disassemble, and we verify before we deliver.

The challenge
The car arrived as a complete, running but tired example of the final E-Type generation – the V12-powered Series III produced from 1971 to 1974. The owner’s brief covered cosmetic, mechanical and trim work that had accumulated over decades of use.
Initial scope discussion identified work across these systems:
- V12 engine: oil leaks at multiple gaskets, oil pressure sensor reading suspect, rear main seal weeping
- Cooling system: cooling fan behavior inconsistent, thermostat age unknown
- Clutch hydraulics: pedal feel soft, suspected master and slave cylinder wear
- Brakes: front and rear calipers showing age, pad life nearing end
- Suspension and steering: worn ball joints, control arm bushings, four aged shock absorbers, steering rack with play
- Differential: seal weep and rear cover gasket leak
- Fuel delivery: aging fuel pump
- Body: original red paint dull and chipped, several chrome pieces pitted, all weatherstripping hardened and cracked
- Interior audio: original audio underpowered, no sound deadening

The 1971 E-Type V12 uses a single overhead cam 5.3-liter V12 producing factory-rated 272 horsepower, paired with a manual transmission and an independent rear suspension housed in a sub-cradle. Servicing this car properly requires understanding both the British engineering of the chassis and the specific quirks of the early Jaguar V12 – including the cooling demands of a long, hot intake plenum sitting between two banks of six cylinders.
Our approach
Before any teardown, our technicians performed a systematic inspection to confirm what was failing, what was suspect, and what could only be evaluated after disassembly. This diagnosis-first approach prevents unnecessary work and ensures every line item is driven by evidence, not assumption. Each phase below was discussed with the owner before parts were ordered.
Phase 1: Diagnosis and scope definition
The bonnet on a Series III E-Type tilts forward as one piece, giving full access to the V12 and front suspension. We photographed every system before touching anything, then ran a baseline assessment: compression and leak-down on the V12, fluid sampling, brake hydraulic inspection, suspension play check, and electrical diagnosis on the cooling fans and oil pressure circuit. The findings shaped the rebuild plan and informed the parts list.

Phase 2: V12 engine service
The V12 received targeted internal and external work rather than a full bottom-end rebuild – the scope was set by what measurements actually showed, not by assumption.
- Connecting rod bearings: during inspection the rod bearings showed wear beyond service limits and were replaced
- Valve cover gaskets: both banks resealed with new gaskets
- Oil pan gasket: replaced to address a persistent leak
- Rear main seal: replaced – a known wear point on the Jaguar V12
- Oil pressure sensor: replaced with a correct-spec unit
- Spark plugs: full set of twelve replaced with the correct heat range
All fluids were refilled with Liqui Moly synthetic oils meeting original specification – the same product line we use across our European fleet.

Phase 3: Cooling system service
Cooling is a high-stakes system on the Jaguar V12 – the engine generates significant heat and the original mechanical and electrical fan configuration depends on correct sensor input and relay function. We tested the full circuit, corrected fan operation, and replaced the thermostat with a unit at the correct opening temperature. The radiator, hoses and coolant condition were verified before the system was refilled and bled.

Phase 4: Clutch hydraulics
The clutch itself was found to be serviceable. The hydraulic circuit was not. We replaced the clutch master cylinder and the slave (release) cylinder, then bled the system to restore proper pedal feel and full release travel. This is the kind of right-size scope decision that matters – the customer paid for hydraulic components that actually needed replacement, not a full clutch assembly that didn’t.
Phase 5: Brakes and suspension
Brake and suspension work was extensive and addressed together to allow proper alignment afterward.
- Brake calipers: front and rear calipers rebuilt with new seals and pistons
- Brake pads: replaced on all four corners
- Steering rack: sent out for professional rebuild to eliminate play and restore correct ratio feel
- Ball joints: replaced
- Control arm bushings: replaced on all relevant arms
- Shock absorbers: all four corners replaced with new units
- Wheel alignment: full alignment performed after suspension and steering work was complete

The original chrome wire wheels were cleaned and rebalanced. Wire wheels on a classic Jaguar are not just cosmetic – they require attention to spoke tension and hub condition, both of which were checked during this phase.

Phase 6: Differential service
The rear differential, mounted in the sub-cradle with the inboard rear brakes, was leaking from both the axle seals and the rear cover. We replaced the input and output seals, refilled with correct-spec gear oil, and resealed the rear cover with fresh sealant. No internal differential work was needed – the unit was sound mechanically and stayed in the car.
Phase 7: Fuel system
The aging electric fuel pump was replaced with a correct-pressure unit, restoring proper fuel delivery to the V12 across the rev range. Fuel filter and accessible fuel hoses were inspected and replaced where degraded.
Phase 8: Interior audio and sound deadening
The owner asked us to bring the interior into the modern era acoustically without altering the car’s character. We removed the carpet and trim panels, applied automotive-grade sound deadening across the floor and bulkhead, upgraded the head unit and speakers, and added a subwoofer integrated to keep the cabin’s classic appearance intact. The result is meaningful insulation from road and engine noise alongside audio that matches what an owner expects to enjoy on a Southern California drive.


Phase 9: Body refresh and weatherstripping
The bodywork was treated as a full refresh, not a colour change. Original red was retained and matched precisely.
- Full repaint: body prepped, sealed and finished in the original red, then cleared and polished
- Chrome: several pitted or damaged chrome trim pieces replaced
- Weatherstripping: every rubber seal on the car replaced – windshield, rear glass, side glass, all door seals and trunk seals
Weatherstripping replacement is one of the most under-appreciated steps on a vintage British car. Hardened seals are the primary route for water intrusion, cabin noise and trim corrosion. Replacing all of them at once – rather than chasing leaks one by one – is the only approach that delivers a properly dry, quiet cabin.

The results
After reassembly and verification, the 1971 E-Type V12 was test-driven through a full procedure: cold start, idle stabilisation, heat soak check, road test for transmission engagement, brake feel, alignment tracking, suspension behaviour, and cooling system temperature stability under sustained load. The car now starts immediately, idles smoothly, holds correct oil pressure, runs at proper coolant temperature, brakes evenly, tracks straight under braking and acceleration, and drives without the suspension noises or steering play it arrived with.
The paintwork matches what the car would have looked like leaving Browns Lane in 1971. Inside, the cabin is dramatically quieter and the audio upgrade is invisible to anyone looking at the dashboard.

Why choose European Auto Service for classic Jaguar repair
Specialized expertise
Our Reseda shop has been working on European vehicles since 1976. Classic British sports cars like the E-Type require technicians who understand vintage engineering and the specific service patterns of cars from this era – not just modern diagnostic tools. Our technicians average over 13 years of hands-on experience with European vehicles, and our parts network includes vintage and discontinued Jaguar components.
Evidence-based process
Every project follows the same discipline: diagnose before teardown, document with photos and video, scope the work from measurements rather than assumption, address supporting systems alongside the primary repair, and verify every result before delivery. The principle is simple – repair or rebuild where appropriate, replace where necessary.
Quality guarantee
Every repair, including classic car work, is backed by our 2-year / 24,000-mile warranty covering all defects in materials and workmanship. We do not install customer-supplied parts. Wear items and consumables (including tires) are not covered.
Classic European sports car services
Our team regularly works on vintage European performance vehicles including classic Jaguar E-Type, XJS and XK, Lotus Esprit and Elise, classic Porsche 911 and 928, vintage Ferrari 308 and 328, Aston Martin V8 Vantage and DB models, and BMW 2002 and E30. Learn more about our classic car restoration services or read about a recent Lotus Esprit Turbo engine rebuild.
What classic car owners say about our work
Looking for more? Read reviews from luxury and exotic car owners.
Ready to restore your classic European sports car?
Contact European Auto Service in Reseda to discuss your project. We serve classic car owners across the San Fernando Valley – Reseda, Encino, Tarzana, Woodland Hills, Calabasas, Sherman Oaks – and the greater Los Angeles area.